Step 1
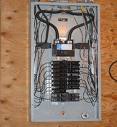
Before beginning this or any electrical repair make sure the power is turned off at the source. (breaker/fuse box) Always test the receptacle for power to make sure you turned off the correct breaker or fuse. Use an outlet tester, available at most hardware stores and lumber yards for around $10.00 or simply plug in a working appliance to check if you can energize it. Once your sure the power is off you can get started with removing the bad outlet. This is a relatively simple process. You'll need a medium flat head screwdriver.
Step 2
First remove the cover plate. usually one screw in the center unless it's a GFCI which have 2 screws.
Step 3
Remove the 2 screws attaching the receptacle to the electrical box. It should come out a few inches. Set the screws aside
Step 4
The wires and screws will be different colors; note the places where they attach. There should be a black (hot0, white neutral) and a green (ground) wires.
Step 5
Loosen the screws holding the wires and remove the outlet.
Step 6
You'll notice that the receptacle has different size slots and different color screws for attaching the wires. The longer slot corresponds to the silver screw. This is where you attach the white or neutral wire. The short slot corresponds to the gold screw. This is where you attach the black or hot wire. The ground which is usually a bare copper or green coated wire gets attached to the green screw. Wrap the wires around the terminals with needle-nose pliers or your fingers and tighten the screws firmly.
Step 7
Screw the receptacle back into the wall.
Step 8
Screw the cover plate back on.
Step 9
Re-energize the proper circuits at the fuse box and test your work. Receptacle testers will let you know if all the wires are attached to the correct terminals.
.